Open-Faced Egg Sandwiches with Ricotta and Mixed Greens


Servings: 2


Ingredients

2 slices bread (your choice; I went with a thick pretzel bread here)

Cooking spray

1 cup mixed greens (or whatever kind of green you like)

2 teaspoons extra-virgin olive oil

1 teaspoon fresh lemon juice

Salt and pepper, to taste

Red pepper flakes, to taste (I used about 1 teaspoon because I wanted it spicy)

1/4 teaspoon minced garlic

1/2 cup ricotta (I used skim)

1/8 cup Parmesan cheese, grated

1 tablespoon green onion, chopped

2 large eggs


Instructions

1. Preheat broiler. (Alternatively, you can toast the bread in a toaster if the slices are thin enough.)

2. Coat both sides of the bread slices with cooking spray.

3. Broil until lightly toasted, about 1-2 minutes.

4. In a medium bowl, combine the mixed greens, 2 teaspoons olive oil, lemon juice, and salt and pepper; tossing gently to thoroughly coat the greens.

5. In another bowl, mix together the red pepper flakes, minced garlic, ricotta, Parmesan, and green onions. Add salt and pepper to taste here, if desired.

5. Generously spray a nonstick cooking pan (use one that you can cover lightly with another lid-I used the lid for my big saucepan, and this worked well, even thought it wasn’t a perfect fit) with cooking spray and heat the pan over medium heat.

6. Crack eggs into pan; cook for about 2 minutes.

7. Cover the eggs and cook for an additional 2 minutes or until whites are set. Remove from heat.

8.  Spread the ricotta mixture over each bread slice; top with the mixed greens and one egg.  Enjoy.


0 comments:

Spooky Ghost Meringues Recipe


It is important to let your egg whites come to room temperature, this will help you get the most volume. Also, make sure all your bowls, whisk, etc are spotlessly clean and free of any grease.

2 egg whites, room temperature
tiny pinch of salt
tiny pinch of cream of tartar
3/4 cup powdered sugar, sifted
tiny silver candy sprinkles (chocolate or little seeds) for eyes

1 dark chocolate bar, melted (optional)
1/4 cup shredded coconut, toasted (optional)

Special equipment:
pastry bag with 1//2-inch tip

Preheat oven to 200F, racks in the middle.

Get everything ready ahead of time. Line a baking sheet with parchment or a Silpat mat. I also like to set up my pastry bag in a tall empty glass to make it easier to fill. Have a spatula on hand.

Place the egg whites, salt and cream of tartar in a large, clean mixing bowl. Start whisking the egg whites at medium speed in a large bowl with an electric mixer or Kitchen-Aid. This stage is all about watching and letting the egg whites tell you what to do next and you have to be nice to them to get them to transform - so avoid turning your mixer on and off. When the whites are frothy and have a bit of volume to them, start sprinkling in the sugar a bit at a time over a minute or two - leaving the mixer on the entire time.

Keep mixing, it usually takes me 15 -20 minutes to get the volume I'm after here, but all sorts of variables can effect this time - weather, temperature of the whites, etc. The whites will become glossy and their appearance will resemble marshmallow cream, keep going. At this point you need much more volume out of the whites, try to imagine making a dozen 2-inch cookies out of the mixture. Whisk, whisk, whisk. You will start to see the volume really start to increase, the whisk will be leaving more definitive trail in the meringue. At this point I usually gradually slow down the whisk, and see if I can lift it out of the meringue leaving a stiff structured peak. Imagine, you are going to pipe this out onto the cookie sheets, so you need it to have lots of structure, if you don't go far enough your ghosts (or shapes) will just collapse into a puddle.

Working gently (but quickly) fill the pastry bay -or alternately, a large plastic freezer bag with the corner snipped off - using the spatula. Try to avoid lots of air pockets in the pastry bag, they make piping much more difficult. Close the bag by rolling the top down a few times.

Now pipe about 12 ghost shapes onto the prepared baking sheets. I found that making tiny circles all the way up was the easiest way to make the shape I was after. Press the candy silver balls one at a time into your pointer finger and place them on the ghost - again, quickly but carefully.

Place the meringue in the oven for an hour. After an hour, open the oven door an inch or two and cook for another 30 minutes. I usually touch one of them at this point, they shouldn't be gummy or wobbly. If they are still too moist, leave them in the oven until they aren't. Turn off the oven, and leave the meringues in there until it comes down to room temperature.

At this point you can eat the ghosts, but I like to dip them in a bit of chocolate and then shredded coconut (see top photo).

If you are storing them, do so in an air-tight container.

Make about 12 meringues.

0 comments:

Strawberry Cake


16 tablespoons unsalted butter, softened, plus more for greasing pans
3 cups flour, plus more for pans
1 tablespoon baking powder
1/2 teaspoon kosher salt
1 cup milk
1/2 cup seedless strawberry jam
3 tablespoons red food coloring (optional, also amounts will vary depending on the dye you use)
1 3/4 cups sugar
1 cup canola oil
1 teaspoon vanilla extract
3 eggs
8 ounces cream cheese, softened
1 pound confectioners’ sugar, sifted
1 teaspoon strawberry extract
Heat oven to 350°. Grease and flour two 9″ round cake pans; set aside. Whisk together flour, baking powder, and salt in a medium bowl; set aside. Whisk together milk, jam, and 2 tablespoons food coloring in a small bowl; set aside. Beat together sugar, oil, vanilla, and eggs in a mixer on medium-high speed until pale and smooth, 2–3 minutes. In 3 additions, alternately add dry and wet ingredients to sugar mixture, beginning and ending with dry; mix until combined. Divide batter between prepared pans and smooth tops; bake until a toothpick inserted in the middle of cakes comes out clean, about 40 minutes. Let cool 15 minutes, unmold, then cool completely.

In a large bowl, beat butter and cream cheese on high speed of a mixer until smooth and fluffy, 1–2 minutes. Add remaining food coloring, confectioners’ sugar, and strawberry extract; beat until smooth. Place one cake upside down on a cake stand, and spread 13 frosting over top. Cover with second cake, top side up; frost top and sides of cakes with remaining frosting; refrigerate for 1 hour before serving. Serve at room temperature.

0 comments:

ALMOND & LEMON BABY CAKES


7 ounces almond paste, broken into 1-inch pieces (1 cup)
3 large eggs
2 1/2 tablespoons cornstarch
Pinch of salt
4 1/2 tablespoons unsalted butter, melted and cooled
1 tablespoon Amaretto
zest of 1 lemon
for the glaze:
2 cups confectioners’ sugar
2 1/2 tablespoons heavy cream
2 1/2 tablespoons Amaretto
1 1/2 teaspoons fresh lime juice
1 teaspoon finely grated lime zest, plus zest strips for decorating

Preheat the oven to 350° and spray a mini-muffin tin with vegetable oil spray. In a food processor, pulse the almond paste several times until broken into small pieces; don’t overprocess or the paste will become oily. Add the eggs and pulse until smooth. Add the cornstarch and salt and pulse until smooth. Add the butter, Amaretto and lemon zest and pulse until incorporated.
Scrape the batter into a small pitcher and pour it into 16 muffin cups, filling them about two-thirds full. Bake for 20 minutes, or until the cakes are golden, puffed and firm to the touch. Transfer the pans to a rack and cool for 20 minutes, then invert the cakes onto the rack to cool completely.
In a bowl, mix the confectioners’ sugar, cream, Amaretto and lemon juice. Using a handheld mixer, beat at low speed until smooth. Beat in the teaspoon of grated lemon zest. Spoon the icing liberally over the cakes, allowing it to drip down the sides. Garnish with lemon zest before serving.

0 comments:

Pickled Shrimp With Fennel Recipe


Servings:8
Ingredients
1 tablespoon plus 1 1/2 teaspoons kosher salt
2 pounds (21 to 25 count) large shrimp, peeled and deveined
1/2 cup white wine vinegar
1 cup fresh lemon juice (from about 7 lemons)
1 small fresh bird or Serrano chile (green or red), sliced very thin on the bias
1 teaspoon sugar
1 small white onion, thinly sliced
1 small fennel bulb, thinly sliced
1 tablespoon chopped fennel fronds
Directions:
Fill a medium stockpot with 2 quarts of water, add 1 tablespoon of the salt and bring to a boil over high heat. Prepare an ice bath in a large bowl. When the salted water boils, turn off the heat, add the shrimp, stirring them once or twice to distribute them and cook until uniformly pink-opaque and just done, about 1 minute. With a slotted spoon, transfer the shrimp to the ice bath. Reserve 2 cups of the shrimp-cooking liquid in a medium bowl.
With the slotted spoon, transfer the shrimp to a plate lined with a double thickness of paper towels. (Don’t dump the ice bath yet!) Add the vinegar, lemon juice and chile to the bowl with the shrimp-cooking liquid and whisk in the remaining 1 1/2 teaspoons salt and the sugar until dissolved. Set this bowl of brine in the ice bath (add more ice to the bath if needed) and whisk until the liquid cools to room temperature.
Dump the ice bath and use the cold large bowl to toss the shrimp, onion, fennel slices and fennel fronds. Pour the cooled brine over the shrimp. Cover with plastic wrap and refrigerate for about 1 hour, tossing once, until chilled and ready to serve. (Pickled shrimp will keep in the refrigerator for about 2 days.)

0 comments:

DBGB's Super Secret Sauerkraut Recipe


Servings:5 pounds
Ingredients
2 heads white cabbage
2 1/2 teaspoons fine sea salt per pound of cabbage
5 tablespoons duck fat
2 medium onions, thinly sliced
1/2 pound bacon, chopped
4 quarts chicken stock
1 750 ml bottle dry white wine (such as Sauvignon Blanc or Riesling)
3 cups Pilsner beer
2 carrots, diced
1 sachet, (3 teaspoons juniper berry, 1/2 teaspoon allspice, 1/2 teaspoon white peppercorn, wrapped in cheesecloth and secured with butcher's twine)
1 stick butter

Directions:
Core, quarter, thinly slice and weigh the cabbage. Transfer to a large bowl and toss it with 2 1/2 teaspoons salt per pound. Squeeze the cabbage with your hands to bruise it and release some juices.
Transfer to a large plastic container or non-reactive pot, and place a weight on top, such as a stack of dinner plates. Wrap tightly with plastic and leave to ferment in a cool place (at 60-70°F) for three weeks.
Rinse the cabbage. In a large Dutch oven, or stockpot, melt the duck fat over medium heat. Add the bacon and onions, and cook, stirring until onions are translucent, about 3 minutes.
Add the wine, beer, stock, carrots and sachet. Bring to a boil, and then reduce the heat to a simmer until reduced by half, about 30 minutes. Add the cabbage and cook, stirring until tender, for 45 minutes to 1 hour. Stir in the butter, remove from the heat and reserve, chilled for up to one week.
To serve, reheat as desired in the cooking liquid.

0 comments:

Sake-Steamed Clams With Soy Butter Recipe


Reprinted with permission from Izakaya: Japanese Bar Food

Servings:4
Ingredients
1 pound clams
1/4 cup sake
2 teaspoons superfine sugar
1 teaspoon Japanese soy sauce
1 teaspoon ginger, finely chopped
3/4 ounce unsalted butter, chopped and chilled
1 scallion, thinly sliced
Directions: 
Put the clams in a bowl, cover with cold water and place in the fridge for 2 hours (this helps to release any sand that may be caught in the clams). Drain the clams, rinse under running water and set aside.
Combine the sake, sugar, soy sauce and ginger in a small jug. Stir until the sugar dissolves.
Put the clams in a large frying pan over high heat and add the sake mixture. Cover and cook, shaking the pan occasionally, for 3 minutes, or until the clams open. Use a slotted spoon to transfer the clams to a serving bowl.
Add the chilled butter to the pan juices and whisk until the butter is melted and the sauce is thickened and glossy. Pour the sauce over the clams and sprinkle the spring onion over to serve.

0 comments:

Roast Beef Hash With Crispy Onions Recipe


Servings:6
Ingredients

Roast beef hash
2 cups yukon gold potatoes, peeled, cut into 1/4-inch dice
3 tablespoons sea salt
1/4 cup olive oil
1 medium Spanish onion, diced
1/2 small green bell pepper, cut into small dice
1/2 small red bell pepper, cut into small dice
2 cups cooked roast beef, cut into 1/2-inch dice
2 cloves garlic, minced
1 sprig thyme, leaves picked
3 tablespoons chopped fresh flat-leaf parsley
1 tablespoon worcestershire sauce
salt and freshly ground pepper
1 pinch cayenne pepper or paprika
beef broth, if desired
6 large eggs, fried
6 slices sourdough bread, toasted
Crispy onions
1 large Spanish onion, sliced very thinly on a mandoline
2 cups whole milk
2 tablespoons Cajun seasoning
2 cups all-purpose flour
1 quart canola oil

Directions: 
For the roast beef hash:

In a medium saucepan, bring 3 quarts of water to a boil and add 3 tablespoons of sea salt. Reduce to a simmer, add the potatoes, and cook for 3 minutes or until they just start to become tender. Drain and spread on a small sheet pan. Refrigerate for a few minutes to stop the cooking.
In a large nonstick skillet, heat the olive oil over medium heat. Add the potatoes and cook until they just start to brown. Add the diced onion and bell peppers and cook another 3 to 4 minutes, stirring or tossing often. Add the beef and toss well. Add the garlic, 2 tablespoons of fresh thyme leaves and 1 tablespoon of the chopped parsley and toss well. Cook until the potatoes are golden brown.
Add the Worcestershire sauce and season with salt and pepper to taste. Continue to toss until the hash begins to caramelize but not burn. You can add beef broth to keep the hash moist, if desired. The chef prefers his a bit crispy and caramelized. You can also add a bit more olive oil, if desired.
Fry the eggs. Divide the hash evenly among six plates and top with the fried eggs. Top the eggs with the remaining tablespoon of chopped parsley, a pinch of cayenne or paprika, and some crispy onions.
Serve with sourdough toast.

For the crispy onions:

Soak the sliced onion in the milk for 3 minutes, then drain well.

Mix the Cajun seasoning into the flour and dust the onion rings in the seasoned flour.

Pour the canola oil into a deep, heavy- bottomed pot. Heat the oil to 350°F over medium-high heat. Line a large plate with paper towels. Carefully lower the floured onion slices into the hot oil, a few at a time, and fry for about 2 minutes, or until golden and crispy. Remove from the oil with a slotted spoon and transfer to the paper towels to drain off excess oil. Continue frying until all the onions are cooked. Set them aside.

Tips from Chef Babian:


  • “If you do not have a deep-fry thermometer, heat the canola oil until a small piece of bread dropped in rises quickly to the surface and starts to brown.”

  • “This recipe a great way to use up leftover roasts, it can also be done with short ribs, prime rib, pot roast, and turkey.”

  • “You can also add beef gravy to the hash at the end of the cooking, or drizzle some on top of the eggs and hash after plating.”

0 comments:

Caramel Pecan Tortoises Recipe


Servings:20 tortoises
Ingredients
3 cups pecan halves
1 batch milk-chocolate caramel (see below)
3/4 cup store-bought marzipan
4 drops green food coloring
2 drops brown food coloring
1 batch tempered milk chocolate (see below)
Milk-chocolate caramel
3 cups ice
1 1/2 cups sugar
1/2 cup water
1/4 cup corn syrup
1 cup heavy cream
6 tablespoons butter
1 teaspoon vanilla extract
1 teaspoon salt
2 cups high-quality milk chocolate, finely chopped
Tempered milk chocolate
3 cups ice
3 cups chopped high-quality milk chocolate

Directions: 
For the milk-chocolate caramel:


  1. Put the ice in a large bowl and set aside.
  2. Place the sugar and water in a medium saucepan. Stir the mixture until it resembles wet beach sand. Use a moist paper towel to wipe out any sugar that clings to the inside of the pan. Over medium heat, bring the mixture to a boil without stirring.
  3. Add the corn syrup and cook for about 8 minutes, or until it turns entirely golden brown, the color of honey. When the mixture reaches 310°F on a candy thermometer, carefully place the pan into the bowl of ice for a few seconds to stop the caramel from cooking.
  4. Remove the caramel from the ice and let it cool for 2 minutes, then add the cream, butter, vanilla and salt, and stir with a wooden spoon. (Be careful! The still-hot syrup sizzles!)
  5. If some of the caramel has hardened on the bottom of the pan, return the pan to the stove and melt the bits into the mixture over low heat. Cool the sauce for 20 minutes, sprinkle in the chocolate and stir until smooth. For the firm semisolid texture that's ideal for this caramel, refrigerate for 1 hour before using in candy-bar production.

For the tempered milk chocolate:


  1. Put the ice in a large bowl and set aside.
  2. Reserve a handful of the chopped chocolate and melt the rest gently in a stainless-steel bowl set over simmering water until it reaches 115°F on a candy thermometer. Remove the bowl from the heat. Wipe the bottom of the bowl with a dry cloth to prevent water from splashing onto the work surface.
  3. Sprinkle the reserved chocolate into the melted chocolate and stir. Cool the chocolate by placing over the bowl of ice for a few seconds at a time, removing it, stirring until smooth and repeating until the temperature drops to 82°F.
  4. Heat the chocolate again by placing the chocolate bowl back over the simmering water for 30 seconds to 1 minute at a time. Once its temperature rises to 89°F, the chocolate is ready to use in candy-bar production.

For the tortoises:


  1. Preheat the oven to 300°F.
  2. Line a baking sheet with parchment paper and roast the pecans until they’re aromatic but not too brown, 10 to 15 minutes, and set aside.
  3. As the caramel cools, line a baking sheet with parchment paper or aluminum foil. Place the pecan halves in groups of four on the baking sheet, arranging each group in an X-shaped formation.
  4. Place the marzipan in a small bowl, apply the green and brown food coloring and knead it in until the marzipan turns the desired reptilian color. Adjust as needed with more food coloring.
  5. Mold 20 approximately 1 1/2-inch, thin marzipan discs and place one over each point at which the four pecan halves intersect. Roll some of the remaining marzipan into small diamond-shaped heads and attach a head to each body.
  6. Remove the caramel from the refrigerator and scoop a heaping 1 tablespoon onto each tortoise body. Press all the pieces firmly together. Refrigerate the tortoises for about 10 minutes.
  7. Have the tempered chocolate at 90°F. Remove the tortoises from the refrigerator and pour 1 to 2 tablespoons of chocolate over each caramel body. (The chocolate should drip over all the elements where they connect to the main body, which will help hold the tortoise together. If you like, dab eyes on each tortoise face with a chocolate-dipped toothpick.) Return the tray to the refrigerator for 10 to 15 minutes. Serve at room temperature.
  8. Store in an airtight container or a zip-top plastic bag at room temperature for 3 days, in the refrigerator for 2 weeks, or in the freezer for 2 months.

0 comments:

Veggie Cakes Recipe With Chard, Ricotta And Saffron


These veggie cakes can serve as a tidy little nibble for a pass-around, be made slightly larger for a first course, or made larger still for a vegetable main course.

These little cakes are so very satisfying, and light enough that you can serve them with a dollop of sour cream and a cluster of micro greens or a chiffonade of sorrel. A mixture of chard and beet greens works well, too. The beet greens may cook more quickly than the chard. If you prefer spinach, you’ll need at least two pounds.

Servings:12 three-inch cakes

Ingredients
12 cups trimmed chard leaves
2 pinches saffron threads
1 cup white whole wheat pastry flour
1 teaspoon sea salt
1 1/2 teaspoons baking powder
1 cup ricotta cheese
1/3 cup or more grated Parmesan cheese
3/4 cup milk
2 eggs
3 tablespoons olive oil or ghee, plus extra for frying
thick yogurt or sour cream, to finish
micro greens or slivered basil leaves, to finish

Directions: 
  1. Wash the chard, drain and put it in a pot with the water clinging to the leaves. Cover and cook over high heat until wilted. You want the chard to be tender but not overcooked, so keep an eye on it and taste it frequently. Add a few splashes of water if the pot threatens to dry out. When the chard is done, put it in a colander to cool and drain.
  2. Cover the saffron threads with 2 tablespoons boiling water and set aside.
  3. Combine the flour, salt and baking powder in a bowl. In a second larger bowl, mix together the ricotta, Parmesan, milk, and eggs until blended. Add the oil and the saffron, then whisk in the flour mixture. Returning to the chard, squeeze out as much water as possible, then chop it finely and stir it into the batter.
  4. Heat a few teaspoons olive oil or ghee in a skillet over medium heat. Drop the batter by the spoonful into the hot pan, making small or larger cakes as you wish. The batter is quite thick and it will not behave like a pancake. You need to give it plenty of time in the pan to cook through. Cook until golden on the bottom, then turn the cakes once, resisting any urge to pat them down, and cook until the second side is also well colored, maybe 3 minutes per side, or longer.
  5. Serve each cake with a tiny spoonful of sour cream and a finish of diced beets and beet thinnings.


0 comments:

Apple Sandwiches - Knead Recipe


Makes 3 sandwiches
1 tablespoon rolled oats
1/8 teaspoon ground cinnamon
3 tablespoons unsweetened peanut butter
3/4 teaspoon honey
1 tablespoon raisins
1 medium apple
Combine the oats and cinnamon in a dry skillet over medium heat and toast, stirring occasionally, until the oats are golden. Cool before using.
Mix together the peanut butter and honey.
Core and slice the apple into 6 rounds. (If you don't have an apple corer, you can slice the apple first and then cut out the centers with a small cookie cutter or knife.)
Spread 1 tablespoon of peanut butter on 3 of the apple slices and sprinkle with raisins and oats. Top with the remaining apple slices to form sandwiches.
Notes: 
• If you are not eating the apple right away, you can brush it with lemon juice to prevent browning. A solution of 1/4 cup water and 1 tablespoon lemon juice does the trick without tasting too lemony.


0 comments:

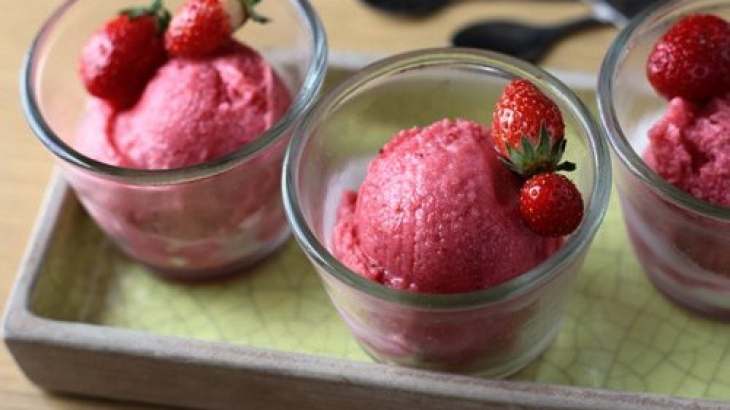
Vegan Strawberry Ice Cream


Makes 1 1/4 quarts (1.25l)

Use very ripe, tasty strawberries for this. Rice milk has a neutral flavor so the strawberries should really do most of the work in this. I don’t strain out the seeds in this ice cream. But you can strain them all out, or just some of them.

As mentioned, I did try soy milk and didn’t like the taste. But for a richer ice cream, you can replace half of the rice milk with coconut milk. For those who eat dairy, you can use heavy cream in place of the rice milk.

I left the liquor optional because some people avoid alcohol, but it does help keep the ice cream softer once frozen; since rice milk doesn’t have the fat of cream, it helps to keep the ice cream smoother. As mentioned, because this ice cream has much less fat than traditional ice cream, it will become quite firm when frozen for a long period of time. So eat it shortly after churning or remove it from the freezer before scooping, to give it time to soften.

1 1/2 pounds (700g) fresh strawberries, rinsed and hulled
1/2 cup (100g) sugar (or 1/2 cup, 125ml agave nectar)
2 tablespoons honey
1 1/2 cups (375ml) plain rice milk
2 teaspoons fresh lemon juice
optional: 2 teaspoons kirsch, vodka, or orange liqueur, such as Grand Marnier
1. Slice the berries and toss them with the sugar (or agave) and honey, and let them macerate for one hour at room temperature.

2. Puree the berries and their liquid with the rice milk, lemon juice and liquor, if using, with a standard or immersion blender.

You can puree it until completely smooth and strain out some or all of the seeds by pressing the mixture through a mesh sieve. Or you can leave it slightly chunky and omit straining it.

3. Taste, and add more lemon juice or liquor*, if desired.

4. Chill thoroughly, then freeze in your ice cream maker according to the manufacturer’s instructions.

*You can add up to 3 tablespoons of liquor to this ice cream; the alcohol softens the texture so the more you add, the less-hard the ice cream will get.


0 comments:

Union Square Café Fried Chicken Recipe


A staff meal at one of Danny Meyer's Union Square Hospitality Group restaurants is a far cry from pasta and "leftover whatever." We're crazy about Family Table, a new cookbook we hope will popularize the trend of feeding staff well and reaping the benefits. Here's a crunchy-salty-sweet fried chicken we'd totally order off the menu. 

What distinguishes this fried chicken is the crunch from two ingredients that don’t usually appear together in a recipe —Japanese panko bread crumbs, which are coarser and crunchier than standard ones, and graham cracker crumbs, which lend a slightly sweet, nutty flavor to the crust. Add a little bit of heat and garlic for balance, and you have one of Union Square Cafe’s most beloved family meal dishes, as interpreted by line cook Ian “Moose” Muse from his mother’s original recipe.

Servings:4 to 6

Ingredients
1 3-to 3 1/2-pound chicken, cut into 10 pieces (legs, thighs, wings and breasts split and halved again; back reserved for stock if desired)
2 cups buttermilk
1 cup all-purpose flour
1 cup panko bread crumbs
1 cup graham cracker crumbs
2 tablespoons paprika
2 tablespoons kosher salt
1 tablespoon garlic powder
3/4 teaspoon Cayenne powder
vegetable oil for deep-frying

Directions: 
  1. Put the chicken pieces in a large bowl, add the buttermilk and let soak for 30 minutes at room temperature, turning occasionally.
  2. Combine the flour, crumbs, paprika, salt, garlic powder and cayenne in a medium bowl, mixing well. Drain the chicken pieces and dredge in the seasoned flour, shaking off the excess.
  3. In a large deep cast-iron skillet, heat about 2 inches of oil over medium-high heat until it reaches 325 degrees on a deep-fat thermometer. Using tongs, carefully add the chicken pieces in batches, without crowding. Cook wings for 6 minutes and the rest of the chicken pieces for 8 minutes. Turn with the tongs and cook on the second side for another 6 minutes for wings, 8 minutes for the rest or until the interior temperature of a thigh reaches 165 degrees on an instant-read thermometer.
  4. Remove the chicken from the oil and drain on paper towels; bring the oil back to 325 degrees before you fry each batch. Serve immediately.


0 comments:

Avocado Cream Pasta Sauce Recipe


We're waiting on chili-rimmed guacamole shots,

Servings:2
Ingredients
1/2 box whole wheat thin spaghetti or pasta of choice
1/2 lemon
1 avocado, halved and pitted
2 tablespoons olive oil
1/2 clove garlic
1 bunch parsley
Salt and pepper

Directions: 
  1. Bring salted water to a boil in a medium sized pot. Add in your pasta, reduce heat to medium, and cook until al dente, about 8-10 minutes.
  2. Meanwhile, make the sauce by placing the garlic, lemon juice and olive oil into a food processor. Process until smooth.
  3. Now add in the pitted avocado, herbs and salt. Process until smooth and creamy.
  4. When pasta is done cooking, drain and rinse in a strainer and place pasta into a large bowl.
  5. Pour on sauce and toss until fully combined. Garnish with lemon zest and black pepper. Serve immediately. 

*Dish does not reheat well due to the avocado in the sauce.


0 comments:

Chipotle Popcorn Chicken Recipe


Servings:4

Ingredients
2 chicken breasts
1 cup buttermilk
1/2 cup canned chipotles in adobo sauce, pureed
2 cups flour
Salt and pepper
1 bunch cilantro, chopped

Directions: 
Cut chicken breasts into 1 ½-inch pieces. Place in mixing bowl and cover with buttermilk and pureed chipotle chilis. 
Cover and refrigerate overnight. Once the chicken has had time to sit in buttermilk, dredge the chicken in seasoned flour and fry in a 350 degree fryer. 
Once out of fryer, season with salt, pepper and chopped cilantro.


0 comments:

Crispy Roasted Chickpeas (Garbanzo Beans)


I highly recommend doubling a batch of Roasted Chickpeas, the bowl will be empty in 10 minutes! This is a one of the simplest snack recipes - four ingredients and it starts with a can of chickpeas pulled from your pantry. You can use any spice blend - I'm really enjoying Creole or Cajun seasoning, but don't limit yourself there! At the end of the post, I have a list of spice/fresh herb combinations that you can use.

ingredients:
One 15-ounce can garbanzo beans
1 1/2 tablespoons olive oil
Salt
Spice blend of your choice

directions:
1. Preheat oven to 400F.
2. Drain the can of garbanzo beans in a strainer and rinse with water for a few seconds to clean off the beans. Shake and tap the strainer to rid of excess water. Lay paper towl on a baking sheet, and spread the beans over. Use another paper towel to gently press and absorb the water on the beans. Roll the beans around with the paper towel to also remove the thin skin from any of the beans. Discard the skins and the paper towels.

3. Drizzle the olive oil over the beans and use your hands or a spatula to toss around and coat. Roast for 30-40 minutes until the beans are a deep golden brown and crunchy. Make sure that the beans do not burn.

4. Season with salt and spice blend.


0 comments: